Showing posts with label stairs. Show all posts

Saturday, March 9, 2013

Trim Diagrams

Before we went out to buy all the fir we needed for our dining and staircase, Steve decided it would be easiest to diagram the space. So what he did was just photograph the space, blow it up and then print it up in black and white.
Next he drew out all the trim we needed to add back in. Finally, he took measurements and wrote them in.
Although this step took an hour and then some, it was well worth the time. It made it relatively easy for me to figure out exactly how much and what types of wood to purchase.
Steve hopes to get started on cutting the trim today and then I plan to mask up and start staining.
I'm in the third trimester now so the clock is surely ticking.


Monday, November 5, 2012

No longer trecherous and fa-ugly


So the new stairs are in and we luv em.  I guess that the word luv is becoming a trend in my posts with everything new going on in this joint.  While the stairs still need a few tweaks (our stair dude will be back later this week), they are almost complete. 

Just a glance back at the old stairs.  They were a lot worse than they look.  You should have seen how they were attached-just to the skirt boards, no stringers-eek!
The stair guy will be back to patch some gaps between the stairs and the skirt boards (due to the bow in the skirt board) and to replace the second to bottom stair riser as the color difference on the lower half is driving me nuts. 
After that, we need to patch the nail holes in the skirt boards, touch up some of the stain work/polyurethane, paint the walls, add the detail piece that goes on the top of the skirt boards and add a hand rail.
After we have the plaster fixed in the dining room, we will add all the trim that goes around the stairwell entrance (a bit of a bigger project being that in addition to the plaster work, we need to purchase, cut and stain all the wood before installing).  Luckily none of it needs to be done right away as the stairs are functional as is.  :)

Monday, October 29, 2012

Hike up your skirts

We've got all the skirt boards in...and they are mighty fine. But first a little about our lazy Saturday...


My pumpkin is the VW Bus and Steve's is Mater from the movie Cars (at top right)

Steve and I decided to take a lazy day Saturday and go to the pumpkin patch and a Halloween pumpkin carving party.  It was so nice to just clean up the house a bit instead of do a project.  Man, was that pumpkin patch wet.  We managed to get there right during a rain break at least.  Not worth it as the pumpkins were all rotten. Totally worth it to see Ben's face as he rode the tractor trailer out to the patch and the roasted corn was amazing as always.


Sunday was work day. 


 As you can see, there is a huge bow to one of the boards, hence the gap between the board and the wall in the picture above.  We are hoping that some ring shank nails will help secure it a little better.  At least there will be another detail piece on top of the board which should help hide the bow.  While I like McCoy Millworks (where we got the wood), I don't like the fact that they don't let you pick your wood and therefore we ended up with some messed up wood.  However, I guess some bowing is to be expected with a 16' 1"x12" piece of fir. 
None-the-less, Steve already thinks that the stairs look all fancy pants with the skirt board in.  The stair guy was here this morning.  He measured and cut all the wood for the risers and treads.  He will put on two coats of Swedish finish in his shop and then return Thursday to install and put on the final coat of finish. 


Ben and Laurel at the Children's Museum Halloween fest this morning.  
They had the coolest glow-in-the-dark sensory room!

Sunday, October 28, 2012

We've got floors

So excited to show you some pictures of our new floors.  We had our Marmoleum (color Eiger) installed on Friday.  We went through Paulson's and had a really good experience.  Even found a  $100 off coupon on their website that I was able to use!


We had metal wrapped on the stair edges to keep with the vintage look, keep them slip resistant and make them more hardy-they are basement stairs after all.

I just love the feel of it under my feet.  All natural.  Non-plastic.  Warm(probably because of our radiant floor heat).  And being that it is an all natural product, their were no harsh fumes on install day!

Now to find a good kitchen wall color....looking for a grey beige color-any good ones you know of?  We tried a sample called Hazelnut Cream from Home Depot but aren't totally sold.  I may go into benjamin moore armed with floor and cabinet paint swatches and ask for their help.

We did decide on an attic stairwell color per my sister and Sharon @ Laurelhurst Craftsman's suggestion-White Hyacinth by Sherwin Williams.  It is a really pretty creamy, slightly yellow, slightly peachy color.  I think it will really help brighten the staircase.

Thursday, October 25, 2012

I love contractors

Not all contractors make me feel this way.  But today I do. 


We had Ben from Advanced Hardwood Floors ((360) 513-7905) arrive this morning to install basement stair risers and treads.  Last night we were working until 9:30pm to install the skirt boards on the basement stairs.  This was after I work up at 6am to put the last coat of paint on them before work.  It is so lovely to come home from work and have a project completely finished and done right.  AND the clean-up taken care of.


Today? sample paint colors, touch up paint on basement stair skirt boards
Tonight?  Finish screwing in kitchen subfloor & vacuum stairs/subfloor well
What's up tomorrow?  MARMOLEUM!!!!

Tuesday, October 23, 2012

End in Sight

 We have definite progress since the weekend.  There really is an end in sight.  We even fit in a party and a trip to the pumpkin patch over the weekend!


 By Sunday night at 10pm we had in our subfloor.  The product is Eurocco (spelling?)-it's a super smooth 1/2" ply made for subfloors-we got it from Parr Lumber in Portland.  It took quite a while to install being that we needed to do a little leveling of the floor below and then cut everything so that it would fit on the stud beam below and allow a really good nail in spot.  In order to not void the marmoleum manufacturer's warranty, you have to put a screw every 3" around the edges of each board and every 6" in the centers....we have many more screws to put in before Friday :)
All of the angled lines on the boards mark where there are gaps in the sub-sub floor below and the horizontal lines mark the support beams below.


And as of last night, the drywall is complete.  I should have taken a picture of the rest of the house-there is a thick white layer of dust and it is sick.  I am about to begin cleaning it up.  Dusting from the ceiling to the floor, right?

I need to paint the skirt boards for the basement stairs today so that Steve can install them tomorrow night as the new basement stairs will be installed Thursday.  This will make way for Paulson's Flooring to install marmoleum in the kitchen and on the basement stairs Friday!

I just finished up staining the side skirt boards for the upstairs staircase.  The front board just has pre-stain conditioner, middle two boards have the first coat of stain on and wiped and the back board has stain soaking before it is wiped.  Yesterday and this morning I added a second coat of stain (makes the color deeper & richer) and two coats of polyurethane.  

Tuesday, October 16, 2012

Drywall


Well, we have drywall and a huge dusty mess on our hands.  I can't believe just how fast these people are at installing drywall-it is crazy!  I think they did a great job hanging everything despite being 4 hours late yesterday and late to return again this morning (I guess they usually are dealing with construction crews and their arrival time isn't as important as it is for a homeowner with crazy toddlers). 


The hanging dudes left about an hour ago and I am expecting the taping dudes to show up any time now. 
Happy Tuesday!

Monday, October 15, 2012

D DAY

After an extremely busy and exhausting weekend working on the kitchen, today is the day.  We finally are getting drywall.  This that means that there is an end in sight.  And I would love to say I am crazy giddy about that but I think I am too tired to be giddy right now. 
Friday morning started with the delivery of the drywall.  We originally planned to have them put in our living room behind the couch as we don't have too many 8' long walls in the house that don't have big pieces of furniture on them.  But when the guys arrived, I found out the pieces were 12' (I didn't even know they made 12' x54" pieces), so we had to quickly come up with plan B-why not the porch?  Luckily, the guys weather wrapped the drywall before leaving.


I spent the first part of the day running around town with Ben picking up cabinet lights, skirt boards for the stairs and a bunch of other miscellaneous materials that we needed for the weekend. 
Sounds easy enough, right?  
Well, a little wrench ran into the whole operation when I was driving our neighbor's rig down Sandy Blvd and the windshield wipers stopped working.  And let me remind you that Portland got 1.1" of rain Friday.   So this is actually not that uncommon for the rig, but usually you can just switch this after market switch and the wipers will start up again.
Not the case.  So just picture me talking to my neighbor's dad on my cell phone while pulled over on Sandy Blvd with my butt hanging out of the hood of the rig and trying to fix the wipers.  I actually (with direction over the phone) figured out where the wiper motor was (1 point) and what needed to be done to get them working again (2 points).  However, I couldn't keep pressing the motor towards the windshield wiper while simultaneously driving.  SOOOO, luckily, the rain was slow at that point.  What I did was just hang out of the window at each stop light and wipe the window off with my hand.  Quite a ghetto sight.  Thankfully I didn't have to go far and the rain held up to no more than a sprinkle until I got home.
PS  I am pretty proud of myself for strapping all of those 15-16 foot board to the rig by myself in the rain

Steve took half of Friday off and got the old flooring ripped out. Not sorry to see the linoleum go but Steve taking out the pristine old growth fir subfloor just about killed me.  I am a preservationist at heart.  I also want to salvage all that I can.  But after seeing the shape of our fir floors in our bedrooms, we knew that the soft wood would not hold up to the daily abuse that a kitchen and back yard access area undergoes (plus we have a dog door in the kitchen as well).  I almost wanted to cry. 
Unfortunately, we did not have the time to take each board up slowly one by one and be able to preserve them so that they can be used for someone else's flooring.  However, we have tons of gorgeous 9-10' strips that I just pray someone will be able to use for a craft, woodworking or other home improvement project.  I plan to put them up on craigslist this week. 

Saturday seemed like it lasted for-ev-er.  Steve and I our electrician were at it for 10 hours.  Steve did a ton of electrical prep, like putting in 2x4s so that we could put our backsplash outlets in horizontally (I feel like this looks more period appropriate and makes the outlets less noticeable.), and measuring out exactly where we wanted all the outlets.  He also had to do a little bit more framing in the stairwells to get it all prepped for drywall.  I honestly can't even remember everything else he did.
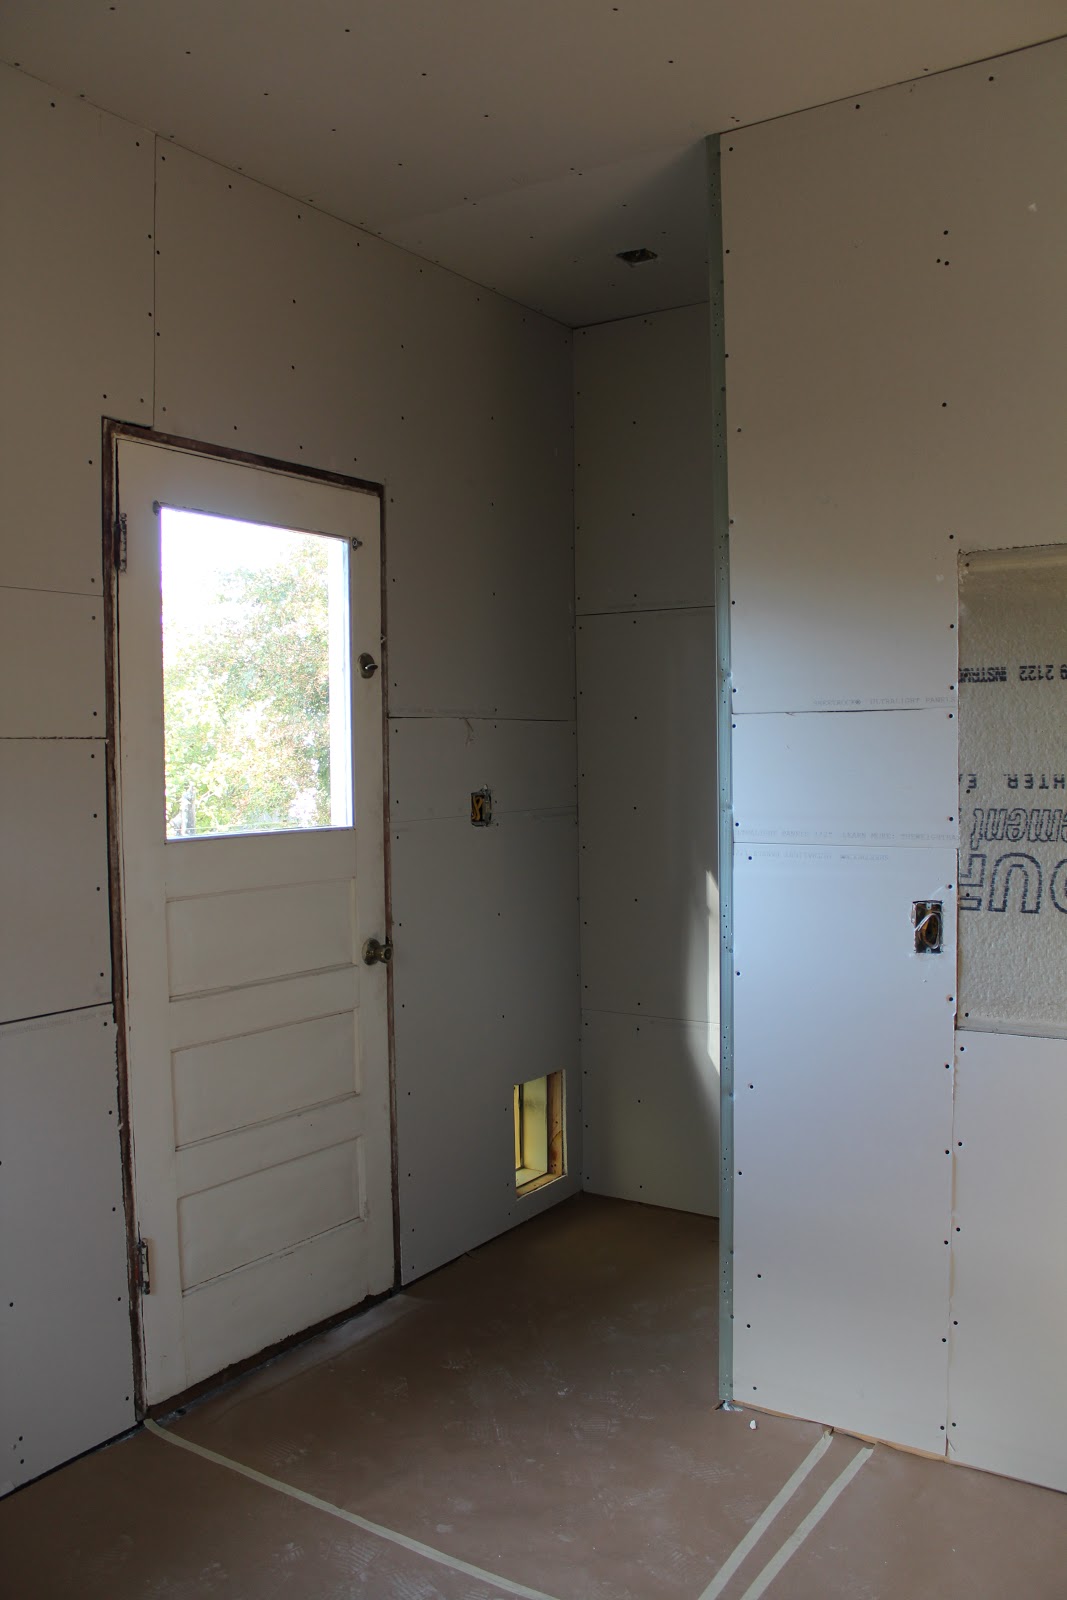
all ready for drywall


Yesterday was also miserably long.  I think Steve started before 9am and we didn't finish last night until 10:45 pm.  I was gone in the morning as Ben fried his brain Saturday with way too much Dora the Explorer so we escaped to the Children's Museum in the morning.  Of course we let him fry his brain again Sunday afternoon with Mighty Machines on netflix.   Oops-not stellar parenting but we had a deadline to meet. 
Anyways, yesterday consisted of:
  • Steve working with the electrician to finish everything up, 
  • re-threading the doorbell wire, 
  • hanging all the insulation (that was my job),
  •  recessing some pipe that was sticking too far out from the wall to allow for drywall
  • hanging tile board
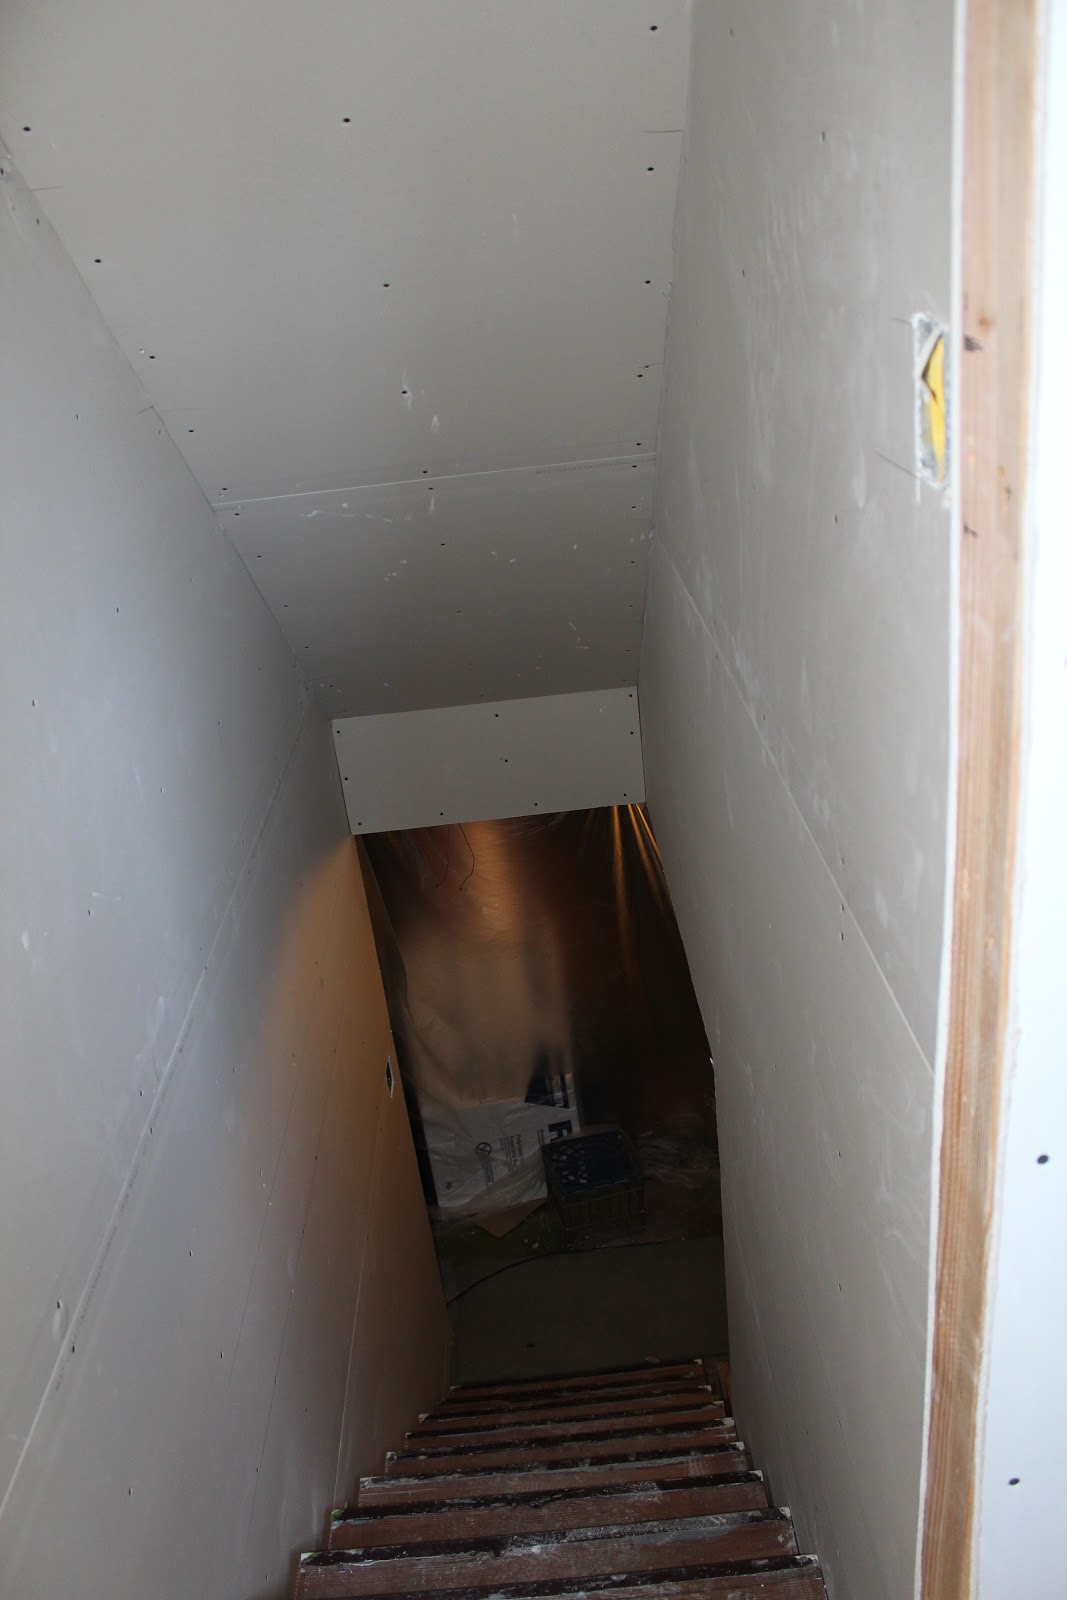
  • hanging plastic in the basement and attic to keep dust down during drywall
  • putting paper on the floor in front of the attic stairwell to protect it during drywall
  • leveling and securing the built-in-no small task with the built-in being brittle and 100 years old and working with walls and floors that aren't square.  It took Steve over 3 hours for this task along but he did an awesome job.
We also had a bunch of small stuff but the important thing is that this phase of the project is done-thank goodness!  Since we didn't have time to put in the subfloor, Steve and his brother (who stopped by yesterday afternoon and ended up helping out for about 6 hours-sooo nice of him) had the wise idea of cutting and stapling a tarp to the floor.  This way, most of the drywall dust should settle on the tarp instead of the basement floor.
Ben had a blast coloring on the wood-he probably thought I was the coolest mom ever for letting him do it-a fun surprise for whomever rips these walls out someday (hopefully not for another 100+ years)

Not I am just here twiddling my thumbs waiting for the dry-wallers who were supposed to arrive 2 hours ago. I could have taken a nap while Ben and Laurel are napping.  Oh well.   I hope they come soon.

Monday, September 24, 2012

It's all framed up

Wanted to share my hubby's progress over the past two weekends...he has been one busy bee.  I am so impressed with him.  He managed to get all this done as well as start stripping the door frame for the basement door despite hurting his back in the process.  Everything is all framed up :)  Woot! 
the framed out rectangle will hold our "faux" ironing board like I talked about here  This is the back of the built-in and to the left is the door going into the kitchen

basement stairs doorway is framed

basement stairs wall all framed with access to underneath for storage

wall between dining room and kitchen

Now just a few more small projects before we are ready for plumbing and electrical. 

Here's our check-off list with a couple more items completed:
  1. finish framing
  2. re-install dining room built-in --this is half done
  3. rip out old floor
  4. patch large hole in floor (with studs) from old chimney
  5. install 1/2" ply subfloor
  6. electrical (that includes getting electrical bids)-hired out
  7. plumbing-hired out
  8. insulation
  9. drywall-hired out (we still need to get bids-is there anyone you can recommend?)
  10. new to us back door (purchase & install)
  11. frame out and install new basement door (we are using the door that went from our bedroom into the kitchen as it is in great condition)--half done
  12. put in gas line for stove
  13. put in vent duct work
  14. decide on pantry pull out shelving placement
  15. order dishwasher--> hoping to hit up labor day sales this weekend and score a deal
  16. order cabinet bin pulls 
  17. order hinges for cabinets
  18. order kitchen sink
  19. clean up basement so contractors have access-it is not only dangerous, but is one scary sight right now --half done

And a picture of the two little munchkins this morning.  It is Laurel's 2nd Birthday today so we rode the MAX train downtown (this is like going to Disneyland for them:) and met up with Steve and Laurel's mom for lunch.  I can't believe how big they are getting.

Wednesday, July 11, 2012

I'm sexy and I gnome it

Steve spent last week getting the stairs all prepped for drywall, treads & runners.  I spent a day cleaning up after him, which I didn't mind at all after of of his hard work:)  While it doesn't look much different in pictures, he actually got quite a bit done.
And now something about these little menz :) We were invited to a fun birthday party for my sister-in-law.  We had libations and treats and spent the night painting gnomes, a strangely satisfying craft.  Maybe it was the beer that accompanied the painting.  Or maybe really that we had been to the Organic Brew Fest all day.  Anyways, our friend Jason actually has a number of vintage gnome casts which he cast and kiln-dried prior to the party.
 I just love how they look, don't you?  They each took a couple hours to paint which makes you appreciate all the little hand-painted figurines you see at stores and estate sales.  The big ones are painted with classic colors and the little guys with metallic paints.  We finished them off with a coat of spray lacquer. 


you can see the cutouts he made in the 2x4 runner to make way for the new wall that will meet at the stairs and edge of the wood floors.