Showing posts with label gate. Show all posts

Saturday, September 3, 2011

Bought a gate pull

After scouring many of the local vintage shops as well as hardware and salvage stores here in Portland, I decided it was high time to turn to the interwebs again (this is what Steve calls them).  I wanted to find a gate pull stat.  Nothing was found on etsy.  but ebay had a few options.  I came across this rusty brother.  Perfect size at 9" tall and asking to be hung proud (just realized this is bit phalic but totally unintentional). Figured that I could sand and spray him if he was too rusty.  Not too ugly of a design either.  And just $14.33 after shipping- I paid an extra few pennies to get priority mail instead of the super slow mail.
Couldn't get a picture to download so either click on the link or see this similar one found here
only mine is no reproduction newbie.
Now that we really do (gosh, I hope) have all of our gate hardware, we just need to find some time to get it all in.

Saturday, August 20, 2011

Day 5-Friday

Friday marked day 5 and yes, it was a success!  Steve took the day off work as he had to travel to San Fran for the day Thursday and it ended up being a day that lasted from 4:30am Th to 1am Fri do to a super delayed flight.  Anyways, he slept in while I snuck in a couple house projects.

we still need to caulk around the tub (and yes, it's been a year since we had it reglazed), so I cleaned the grouted areas really well and hope to get that finished up this weekend


Also, fixed up a few things in the babe's room.  Took down the adorably cute handmade mobile as I realized this week that Ben could totally grab it (for some reason I guess he hasn't realized yet that he could) and then it would be a potential strangulation hazard.  you should have seen me standing on the crib rail trying to reach up to the 9' ceiling to take it down.

and re-hung the Audubon print that some how fell down (and thankfully landed in a pile of pillows, therefore not shattering) a couple weeks ago.  Yes, I realize that one of the prints fell down in the frame but I hesitate to add any adhesive to the back of the print because it is part of an antique collection and I do not know if it has value.  Any ideas on how to fix it?  I have tried putting paper behind in and some foam but it does not seem to work.  Maybe I need larger foam or some cardboard.

Also finally hung the Rejuvenation Copper No Soliciting sign that we have had sitting in our front entry way with a drill and drill bits for the last month.  I realize that this is a total splurge at $37 but I justified it being that I found no other pretty signs after searching for several years and I hate solicitors.  My friend suggested that we just try making one but first of all, do I have the time?  NO.  and I figured that by the time a got a custom cut piece of copper and all the supplies, I wouldn't save much money.  Also, we have spent drillions of hours working on the outside of our home and tons of money and dag nabbit, I want a pretty sign that tells annoying strangers to stay the bleep away and not bother us.  :)  Anyways, got a 20% coupon for one item at Rejuvenation a month or so ago and since we had nothing else we needed at the time, I decided to go for it.  AND we luv it!  Totally worth the cost.

After doing that, we took a quick trip to Winks hardware (they are only open M-F) to return the fence gate latch that did not work with our small gate between our driveway Ben pen and backyard (yes, nice gate hardware that works with our setup is apparently a bitch to find) and bought a new latch for our large Ben pen gate (and no, sadly, our the hardware we ordered for the front gate did not work either).  I luv winks, those people are so helpful and they seem to have it all.
new Ben Pen gate hardware
 While we were at it, I wanted new Black (and yes, they cost too much) stoppers for the door stopper we plan to put on our bathroom door to keep the glass doorknob from hitting our little cabinet by the sink each time we open the door.
After all that, we took off to Sauvie Island beach for the afternoon and went blueberry picking as well.  The weather could not have been better and we had a blast. If you are going to Sauvie Island beach, I highly recommend driving all the way past Collins Beach (unless u are into nude beaches and want to just stop there) to the little area a mile or so further down the road.  The beach is gorgeous and the water is shallow and warm.


Monday, July 25, 2011

*Stain*

It's been awhile since I've posted but all for good reason.  We took a little vacation to Cali to enjoy my family and some beach time


Ben with his great grandma who is amazing at 92; of course he visited with all his uncles, auntie and grandma and grandpa as well

think he likes the beach?

Steve loves diggin holes

and Ben loves standing in them

and have been actually trying to enjoy the awesome summers in the Pacific NW.  This weekend we did some house work but also hit up the Division Street Fair on Saturday, hit up some local parks, took part in biking Sunday Parkways NW (Ben is so into riding in the bike trailer these days) and spent some time letting Ben romp in the water and climb the falls at Jameson park in the Pearl.  It was awesome!  We were going to go berry picking as well but that will just have to wait a bit.  

Anyways, enough of our lovely summer and Ben cuteness and onto house work-sigh!

While Ben and I went down to Cali a few days before Ben (you know, someone needs to bring home the bacon), Steve spent pretty much a whole weekend staining and I plan to sort of detail the steps and extremely time-consuming yet worthwhile (coming from the mouth of someone who only put in about 2 hours of labor BUT Steve thinks it was worthwhile as well).

We decided on using a product recommended by Custom Cedar Products where we purchased our fencing wood.  We liked the product because it was environmentally friendly, lasts 4 years before needing a re-coat, protects the wood and the Timber Tek UV store on Burnside and 22nd gives free color samples which is a plus.  Plus (again), we also got contractor pricing because we had bought our cedar from custom cedar products.  They did the math for us an figured that we needed 3 gallons which was pretty much precise with us having about  1/16 of a 3 gallon bucket left over after putting 2 coats on all the cedar except the lattice.

1. wash with clean and brite.  Also a product sold at the same store.  We used just a 1/2 gallon and were able to sell the other half to our friends who are about to stain their new cedar fence.  This product was awesome as there was already many water stains and a lot of dirt on our fence.  We also had a small amount of mildew which came right off.   In addition, it helps brighten the wood a bit (that is remove mild greying of the wood which we were already beginning to see after just a couple months).  You follow the directions on the can which basically tell you to dilute the product, scrub it on (Steve used a hard bristle scrub brush) and rinse.  This took a good portion of Steve's Saturday after he had taken us to the airport and went to buy the cleaner and stain.
2. allow to dry well

3. Start the staining process.  We opted for Walnut color after sampling 4 different colors (wish I had a pix of the samples color board we created).  Steve informed me that this step takes a great deal of time (as in he worked from 9-9 on Sunday to put two coats on pretty much every thing except the lattice).   What a trooper!  For him, he found that the process was a little bit harder with just one person.  He switched between rolling on the stain with a regular old paint roller and brushing it out with a large brush and spraying it on with an old spray bottle and brushing it out.  He opted not to use a hose sprayer due to the mess it would have created and that it may have stained our concrete as well as gotten all over our organic veggie garden.  Not much to report on which was easier for him.  You let the first coat dry and then apply the second. 
as you can see, the temp needs to be just right, bot too cold or too hot-the product (as with all stains) will get sticky if it is too hot and sunny out
 The process got a bit harrier with the lattice.  Yes, we love the lattice but it was a pain in the butt to stain.  This is where I actually helped out.  We decided not to spray on the stain as it is super messy and would have involved one person holding up a board or cardboard to block the stain from getting everywhere and the other person spraying and the spreading with a paint brush.  Just decided that did not seem to be the best use of man person power.
partially stained...the large vertical boards stained

It involved taking sponge brushes and just dabbing it on-we got the first coat on (doesn't seem to need a second as water is beading just fine) in a couple hours of both of us working.  Here is a terrible video of what it entailed.  You also had to make sure that you did not get any stain on the other side of the fence as you would have to run around the fence and spread that blob out so it did not leave a big spot of darker stain later on. 

4. Enjoy! Enjoy! Enjoy! 
we love the darker, non-orange color and how it repels water
the upfront side is stained but not the back side-can you see the greying on the back side?

Monday, June 20, 2011

And the Ben Pen is in action!

Steve spent father's day whippin' out the remainder of the fence and man, does it look awesome!

But this did not start before we hit up Pine State Biscuits on Alberta for breakfast sammies-yum! and of course, Steve had to open his father's day gift which included several 22oz craft beers, a super power weeder (have I ever mentioned that Steve LOVES to pick weeds?), and a handmade card with Ben scribbles inside. 


We just have a few last projects to be 100% done.
     1. put on gate hardware (it's on it's way to our casa as I type)
     2. stain this puppy-we have no clue what color to do so I need some help-anyone have any suggestions?
     3. put on copper caps with construction bond-this also entails making all the 4x4s the same height
     4. getting stronger springs for the wheels
     5. pouring concrete where the wheels hit as right now they go over the dirt (there are some      concrete and quartzite chunks in place for now. 

Wondering why we didn't just make life easier by having the gate open from the other side?  I thought that it would look better to have the gate hardware on the south side (side where the neighbor's and our driveway connect) and we usually have all of our trash cans on the other side by the chimney so I foresaw the future and getting quite frustrated each time I needed to move trash cans in order to go in and out of the gate.  Also, Steve rides his bike to/from work daily and usually comes up the south side of the driveway so it made sense to have it open from the south side.
It is supposed to be 85 tomorrow and I can't wait to test out the new set up. 

Friday, June 17, 2011

Mini gate goes in

One advantage of Steve's work place is getting to take half day Fridays during the summer (that is if he puts in his hours earlier in the week), so today he was home by two!  He got right to work (and I joined in once Ben went down for his nap) piecing together what he could on the large gate, finishing up the small fence area next to the chimney


and then taking on the tedious task of figuring out which pieces of wood that we have we still needed to use and what we needed to purchase.  We are hoping that this will be our last trudge out to Custom Cedar Products.
Anyways, a few pix of the progress this afternoon/tonight!  A well deserved glass of wine up next!
old gate removed, turned on side and acting as temporary dog barrier...we considered replacing the 4x4s but they are in concrete and that task just seemed like a little too much to take on right now-plus not worth messing with it since it is so close to the foundation of the casa
measuring the wire, marking with sharpie and then saw-sawing it up


hinges just about done (we picked these up from Mr Plywood today-nothin' special but they'll do the trick and are black like the rest of the hardware
We set up the gate to swing out towards the driveway and side of house and plan to figure out some sort of inconspicuous latch the we can use to keep it open when we want full access between the backyard and driveway.  It is temporarily bungeed shut to keep the pup in until the new latch arrives.
you can see the old gate in this pix-yuck!

Thursday, June 16, 2011

Fence Gate Hardware

I headed off to Winks hardware on SE Stark today to find some gate hardware for our fence since I was not so fond of what they offered at Home Depot.  I was so proud of myself for finding what I thought was an awesome latch (with the help of the staff, of course, who are so friendly and helpful).  What I found was an American made (score 2 extra points, right?) latch by Acorn company like the one below.
Acorn Thumb Latch Bean
However, when Steve got to looking at the latch tonight, he discovered that it would not work because it was not deep enough to go through our 4x4s.

Back to the drawing board.  Finding a good latch that was under $30 was too easy, right?

After hunting around the internet tonight, I found several latches that I really liked but spending over $75 (+ s and h) on a latch seems a little steep being that this fence is costing a ton (due to the clear cedar) and $75 seemed like too much to spend after finding a perfectly decent $25 latch.  Here is an example of a really nice arts and crafts-ish (but somehow a bit southwestern at the same time) latch that I found for $79 + $5 for the extra length needed to fit a 4x4 at Wild West Hardware

But then we came across this Suffolk Latch from Hinge and Latch:
not exactly the latch but very similar
We decided on this because it accommodates a 4x4 and will work nicely with the black hinges and post brackets.  And it was just $29.  I was also able to purchase an extra latch only piece for $15 that we will use when we rebuild the small gate that goes between the garage and house (we don't want Ben to have constant free reign of the driveway area and backyard).  So all together (after s+h), I spent $57 for two different latches instead of around $100 for just one.  Excited for it to arrive and get this fence finished!

Monday, June 13, 2011

The gate is coming along again

Steve finally found some time to get back to the fence this past weekend.  On Saturday he went full speed ahead but well, on Sunday, he got distracted and efforts went towards making the backyard entertaining ready. This week he plans to figure out what other pieces of wood he needs to complete the fence and I hope to get the cedar store on Thursday when I am without babe. 

Now we just need to pick up one more wheel since this fence is one big dude and is H-E-A-V-Y.  Also need to research some fence hardware to lock/open/close it since I am definitely not in like at all with the stuff at Home Depot.  I would really like something that allows us to open and close it from each side without having to do the little string rig up deal-e-o that you see on many simple gates. 
put on the first hinge without a problem

this is where the problem arose; Steve had to drill out the ground bracket in order to mount the lower hinge on top of the bracket....what a pain but ended up being a pretty easy fix

drilling a support bracket

and the gate goes up

you can so the spring/wheel hardware on the left side of the pix; getting ready to drill on the wheel

wheel #1-to put a second wheel on the other side to hold this big sucker up
there is about a 1/8" clearance on the ground with just one wheel attached
And another look at the gate (yes, we still have that huge pile of compost that we need to finish spreading)
We also made a trip to Mr. Plywood on Stark and found these fence post caps...I was eye-ing the beefier post caps, however, they don't work (And are at least $10 a pop more) as they will not fit with the clearance between the gate and the fixed posts and where the fence posts connects with the garage.  We simple need to level out all the posts and attach these toppers with a little construction adhesive.


And Steve's backyard progress...
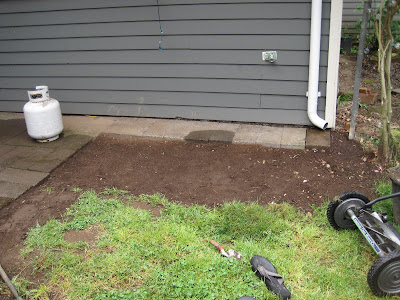
Steve removed the rest of the pavers and small rubble and readied the area for some sod....lovely mud pit right now and my clean, mopped floors are already covered in doggy prints-motivation to get some sod STAT!


Steve added dug up portland potatoes rocks around the new bench and filled on with pebbles to cut down on dirt and mess

added more dig up rock around these pots which we plan to fill with Bamboo (more on that endeavor soon)
this is just funny as all these tall flowers sprouted out of nowhere and we kinda have a forest in the NW corner of our yard