Before we started, I did a bit of reading about plastering on the interwebs and found the Bob Vila videos to be most helpful.
A few helpful sites with info on plaster repair & skim coating:
- Bob Vila video
- this video is nice as far as the steps needed in doing plaster
- Bob Vila video
- this video details how to apply the plaster (thickness, going back over, etc.)
1. First, be sure to cover everything up-plastering makes quite the mess-picture plaster chunks flying everywhere.
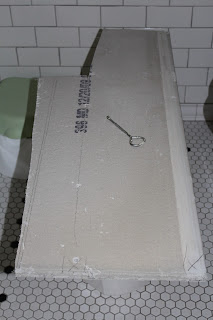
I then found a chunk of tile board in the basement to "prime" and later patch (which Steve did first thing when he got home) in the barren areas of wall. I used this as opposed to blueboard (a product like drywall that is made specifically to take plaster) because I wanted depth to match exactly and everything else up was tile board. If you use blueboard in the first place, then you can skip this step. I then put a coat of plaster weld on everything to get it ready for plaster to adhere to it. I would recommend a disposable foam roller or brush so that you can just toss it when you are done but I used a brush (which actually cleaned up pretty easily) to apply because it was all I has on hand. We purchased all the plaster materials from Knez in SE Portland 2 years ago (yes, this project has been delayed that long!)-I remember that it was one of the first outings we took Ben on. He must have been a week old-how time flies, he will be two in April!
And then you can plaster over the product from the point that it is tacky until 2 weeks later.
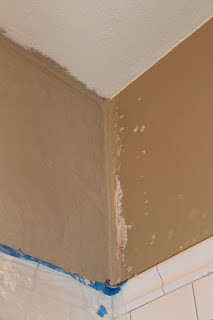
2. Apply mesh tape to seams. Generally you would put wire bead on the outer corner edges but the other corner in our bathroom (seen just above) is quite round so we wanted to match the softness of that corner and metal bead makes corners very sharp. Metal bead also reinforces the corner edges-something we don't have to worry about being that this edge starts 6' up.
3. The scary part-mixing plaster. Only make enough that you can use in about 30 minutes or so. We used Imperial Plaster Veneer to skim coat. We mixed in water until it was thick enough that it would basically retain its shape when you turned the trowel. Think about not wanting the plaster to just fall off the wall when you apply it.
4. Plaster away! This is harder than it looks and it helps to be an anal person (but not too anal cuz a DIY'er with no plastering experience can get it truly smooth. lucky for us, our bano walls have lots of texture so this wasn't a problem. Apply your first coat about 1/8" thick and be prepared to go over it many times, switching the direction of the trowel each time. The videos also suggested getting the plaster on and then moving on and letting the plaster "set" for a few minutes before coming back and smoothing it more.
 |
| I promise, it looks much better in person |
5. Our plaster was ready for a second coat (hard) after an hour or so (that's why you only want to mix small amounts at a time) so Steve applied again, this time he made his plaster a bit thinner and spread it on pretty darn thin. Just enough to cover all the imperfections. After getting it pretty much the way he wanted, I got to be the teacher and point out all his mistakes. He then went back over the plaster for quite some time, dipping the trowel in water in between passes so make the plaster a bit more pliable and easier to work with.
 |
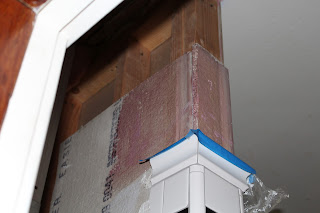
| ceiling patch-visible lath will be covered by cabinet |
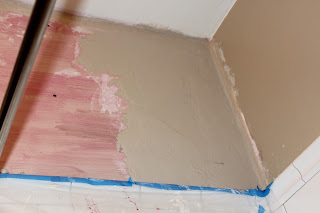
6. Wait 10-14 days (if you just skim coated) for everything to cure (supposedly the plaster will turn pinkish) before you prime and paint!
Up tonight? Grind tile and complete new hall outlet. Too bad I will be at a work function and can't participate-hehe.
Oh yea, don't the professional plasterers in the video make it look wicked easy and then you look like a dork with two left hands?


It looks great! Congrats to Steve. We have some plaster repair in the next bedroom we're refinishing and so I appreciate the links to the videos. Thanks!
ReplyDeleteI needed this. I'm so not motivated to finish the plaster repair in our office. Thanks for the motivation!
ReplyDelete