 |
| Pelican Brew Pub |
 |
| luv little kid hats that have ears-Ben's puppy hat |
 |
| and the fox hat |
 |
| he figured out how to put his hands in his pockets and thought he was hot stuff |
I have been talking over the last couple months about getting some things done in our main (and only real) bathroom before my parents came to visit as my dad was planning on building us a storage cabinet. Well, while my parents did visit all last week (and it was lovely), of course plans got diverted and he ended up working on our basement bathroom.
While it would have been completely lovely to have our primary bathroom looking more finished, Steve didn't get the chance to finish a few projects (electrical primarily) before my parents arrival. We had also been planning on putting in a large storage cabinet in our basement sooooo naturally that is the project that my dad took on.
Monday was pretty much a wash as my parents flew in mid-day and I had the little ones to watch. My dad and I spent half of Tuesday shopping for supplies to work on the basement and installing a new sink at a property we manage while my mom watched the kiddos. And that brought Wednesday which took my dad on an adventure-going empty in a borrowed truck and luckily coasting into a gas station, getting lost and then finally getting cabinet grade plywood (on sale, woo-hoo) from Home Depot and some other needed supplies. So really my dad was only left with about 2 days to build. And he did an awesome job.
 |
| this is what the space (where the shelves ended up) looked like...you can see the sink plumbing in back |

My dad didn't know we had a router, so originally he was going to cut grooves to slide the shelves in with a circular saw, however, I came home from work just on time on Thursday for him to explain what he was planning. Luckily, I let on that we had a router which saved him hours of work cutting. I ran up the street and picked up a 3/4" mortise router bit which makes those awesome cuts you see above. He drew straight lines using a tape measure and level and then attached a 2x4 to run the router along to keep things straight. We do have a router table but it is much too small for a project like this.
 |
| he first leveled out the ground by adding 2x4s under this plywood (base of cabinet) and shims and using a level to check everything. |
I forgot to sand in between the primer and paint so now some of the boards are pretty rough and therefore I need to go back with some fine sand paper and then slap on another coat of paint. It saved so much time by painting before assembly.
Once my dad had everything all cut and ready, we crossed our fingers and prayed it would all fit together and go in smoothly. He originally planned to assemble in all on its side, however, with low basement ceilings, my dad and Steve quickly discovered this wouldn't work.
Plan B. They decided to assemble it upright just outside of the opening my dad framed for the cabinet. After an hour or so and lots of pounding with a rubber mallet or hammer with a chunk of wood in between the hammer and cabinet, we got it all fit together. And it even looked like it might just all work. We found that it worked best to fit one part of the cabinet together, glue and nail it (with just one or two nails to start so adjustments could be made if needed) with an air gun and then move on to the next area. The glue was not dry until after it was all together so nuthin' was set in stone. We didn't put in the shelves until it was all in place.
 |
| this is the side of the cabinet that we will access from outside the bano-has the laundry chute and Steve plans to store his bike gear in here |
 |
| inside bathroom access-tons of storage!!! |
After it was all put together, we first attempted to just slide it in on top of the base wood, but found that it was too tight of a fit. So they took out those boards, slid it in and then lifted it to slide the base plywood back in. AND IT FIT!!!

After some playing around, they also got the shelves in, but found that the cabinet had flexed a bit so everything needs to be pulled back together with some shims between the framing and the cabinet so that the shelves fit more snugly.
You can see the laundry chute cut out! At last the clothes won't fall to the floor and make a huge mess!
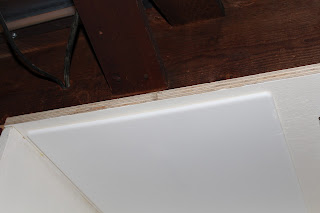
And to the left of the chute, we put a plumbing access panel (for the tub drain just above) and covered using the spring fit cover just above which is a bit of a rip off at $15 for a piece of plastic and one metal spring but also awesome being that it allows easy plumbing access and will fit any opening between 10-15". Home Depot also sells 9"x9" version. We will surely use this again for access to plumbing when we build our other bathroom cabinet.
Someday we plan to build doors to the cabinet but that is real low on the list of things to accomplish. Thanks again dad and mom-you are awesome!


No comments:
Post a Comment