Sunday, March 27, 2011

Nursery Updates

Lonely little owl vinyl decal from etsy
I have been wanting to spruce up the walls in Ben's wall for a while now but just haven't had the umph to do so.  Well, with trying to clean out the house and simplify, I came across a few things that I thought would do the trick. 
Joann's B-painted up white

I also fell in love with the wooden/cardboard/steel letters that I have been seeing in home decor these days-not so much bungalow, but super cute!  On a recent outing to Joanns ( I know, I am supposed to be reducing, right? -couldn't resist), I came across all different kinds of letters and picked up 3 ranging in size from ~6"-18".  The 18 incher didn't end up making the cut and thus got returned, but the other two are hanging happily above the changing table now.

I re-discovered a shadow box in my attic that my dear friend gave us as a wedding gift-it had our wedding invitation and a few other momentos in it....only problem was that it was white and did not fit with our decor so I had never put it up.  Well, I put some of Ben's momentos (first foot print, ultrasound pix, birth announcement, hospital ID bracelet) from his first couple months of life, along with one of the wooden B letters and a mini pair of socks that my grandma gave to me.  The socks were given to her when she was first married by the local sock maker/shoe repair man.  He had them as a display item in the store at one time, therefore making them probably almost as old as our house.  My grandma said that my dad's feet were too fat to ever put them on and Ben's were as well but they are so sweet and sentimental and I am so happy to have them displayed.

This little owl is no longer lonely.  Hoot! Hoot!

The last little grouping on the wall is two old door trim pieces.  I have looked all over Portland for these over the last month or so.  They did not have them at various antique shops, including Stars in Sellwood, nor did they have them at Rejuvenation or the Re-Building Center.  But they did have them at Old Portland Hardware (40th and SE Division)-an awesome place that I highly recommend you check out id you have not yet-independently owned shop with eclectic items, old hardware and other awesome things.
Ben with our neighbor Chella, taken last week-note lonely mirror on wall

On the wall by the big cushy chair in Ben's room, I had a circular (~18") 1940's mirror hanging.  It looked adorable but just needed a little more to it.  I have had a close to matching rectangular mirror that was made to lie flat on a vanity.  I have always wanted to group these together but just never had a place so up went the mirror-hung with metal plate hanging hardware. 

Next to that went the little antique baby porcelin baby bowl that used to be on the side table in Ben's room under the lamp.  It was perfect for chapstick and little what-nots in those early days of nursing but became eye candy to Ben when he started standing and was quickly removed.  I just love the little nursery rhyme on it. 
probably need to clean the small mirror, eh?

I luv that you can see his owl mobile (made by his auntie) & vintage bird prints in the mirror reflection

The last item was totally unexpected and was given to Ben Friday night by Steve's parents old next door neighbor.  Her and her daughter came up from Eugene to meet Ben and visit.   They gave him the cross-stitch that Steve's mom had made for her son in the early 90's.  This is just so precious to us being that Steve's mom died suddenly in a car accident just after we got engaged and therefore never got to experience the delight of grand-kids.  It is just so special.  I painted the frame to go a bit better with Ben's room today and up it went. 
taped it off

mixed some paint so not stark white

painted it (3 coats) and...
still need to get a pix for the frame he was given by his great-aunt, the B was a chance find at ikea, the block letters belonged to Steve's dad (same initials) and the owl was made by a friend-needs better organization but love the picture above
Steve stole this pix last week during nap time
 and Woot Hoot (hah)!  There it is!  Ben's room is hopefully done until he needs a big boy/more BOY room in a couple years

Friday, March 25, 2011

Happy Spring!

With spring comes outdoor projects and we are trying to get a head start on them this year.  A month ago, Steve was already outside stripping the paint off the final side of our garage and even got it primed.  We hope to paint once it warms up a bit...I think our neighbors are happy being that this part of the garage borders their driveway and they have been asking us for 3 years now when we plan on completing it.

and I ramble.  Back to spring.  Steve spent much of the weekend digging 10" wide by 24" deep holes for a fence and gate we plan (with the help of my dad) to install over the next few weeks.
 And I went shopping!  We have wanted to get some new porch furniture for a long time.  We already had some super cool Adirondack chairs that Steve's bro made us as a wedding present but the only problem with them is that they did not allow us to snuggle on the porch on warm summer nights while drinking vino (or beer) and the porch could only seat 4 (2 on porch swing which is really far from the two chairs that Steve's bro made) unless people sat on the ground or steps.  SO, because Tar-jay was having a sale on their patio furniture, I we decided to go for it.  I also really took a leap and got the target credit card while I was at it (which I have been meaning to do for a long time since I practically live there. side note: I think Target is where people who have babies go to have fun) and saved an extra 5% of the purchase.  While I spent a lot, I ended up saving well over $100.  Here is what I purchased for our porch:
While I was super happy they came with cushions (main reason why I didn't by the loveseat from home depot which was $30 less after sale price but did not come with a cushion, nor could I find the matching chairs in a finish other than white), the cushions blew right off the first night we had them.  We live on a ridge and it gets mighty gusty up here.  Anywho, after a trip to Joanns to pick up some ribbon type stuff to match the cushions and a bit 'o sewing, we're in business.  Here is the finished product:


purchased the pillows last summer at target-notice little ties added to the sides

first sign of spring at our place
Come-on now, just give us some warn weather this weekend so we can have some
friends over to really test 'em out!

Sunday, March 20, 2011

Roof Saga Part Deux


So once we had completed the chimney torn out, the real work began.  We found an awesome independent roofer who was willing to work with us in phases.  We needed someone who could come and tear off the whole roof (plywood included as there were already 3 or 4 layers and the plywood was in sorry shape) and then wait for us to replace all of the rafter tails (rotten) and tongue and groove.


So within a week or two, this is what our home looked like and we were committed.  Sexy hot bungalow.
 SO what is with the tarps you ask?  Wasn't it the middle of August '08 (enter some catchy endless summer-esque tune)?  Well, I guess I never took a picture of our open to the elements/you could almost star gaze at night-style house (sans drywall).  When the roofer lefts, we just told them to leave it all open as they tore off the roof on Friday and we anticipated getting a large chunk of work done by Monday and there was NO rain anywhere in the eminent forecast.  I repeat, NO rain, after all is was August in Portland.  Well, I guess I am just a naive SoCal girl but Steve has no excuses being from Oregon.  We found ourselves hearing the putter patter of rain on our non-existant rooftop at 2am one morning and started freaking out.

After finding out the Wal-mart in Vancouver (I hate Wal-mart) was the only place open 24-7 that had tarps in the Portland-Vancouver metro area, we pulled on some clothes and next thing we knew, we were in Washington and roaming the aisles of an eerily quiet store.  $200 later we were on our way home with more tarps than we would ever be able to use again, but enough to cover the roof.  You should have seen us less than happy when we finally finished tarping and "roofing" the house at 5am and just before a rainstorm began.  Here is another few-you can see a couple installed rafter tails poking out.


It took us several weeks of non-stop work (well, we worked from the time we got off work until it was dark each night and then set our alarms on the weekends to start).  BUT, we got it done. and the roofers were happy because, while they did not show it, they were probably tiring of waiting.
But we learned a couple lessons.
1. Don't try to line up the rafters tails evenly upon initial install....it is so much easier to do later on
2. Be really careful putting in rafter tails as plaster is right behind where they insert in and plaster does crack (luckily there were only a couple super small breaks in the plaster)
3. Paint your tongue and groove before you put it up unless you plan on hiring a painter to come in later....we did paint beforehand-YEAH for us!

4. Don't be stupid and take on this project in the first place as living on a roof in the middle of summer when it is either raining or 100 degrees is not fun.  Imagine trying to haul the air tools up there each day as well. 
Must have been the start of the project-Steve is still smiling


All even but not without much ado
Guess we were so over it by the time we finished the tongue and groove that we forgot to take pictures.  Oops!  But here is one with the roof complete and you can see the pretty new tongue and groove

Sunday, March 13, 2011

The roof saga begins

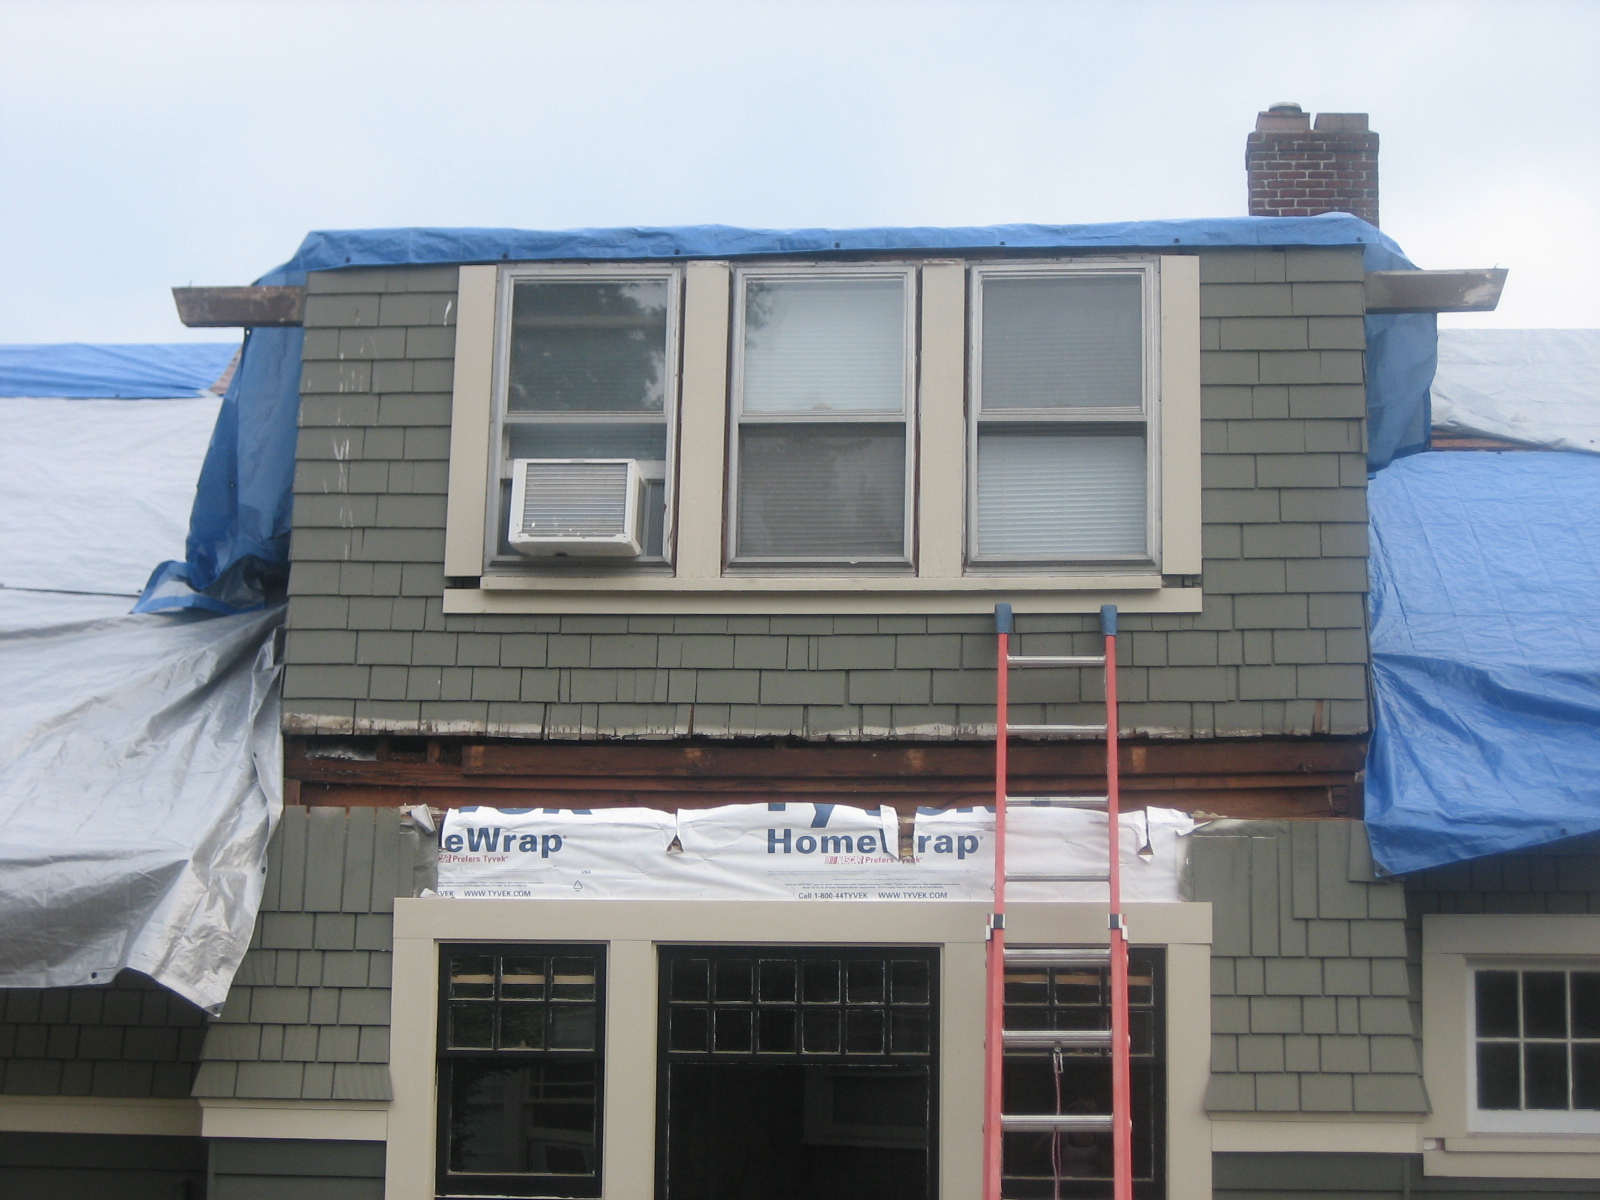
In summer 2008 we decided that it was high time to get our roof replaced.  It was in sorry shape.  IT was basically hanging on with some tar that Steve had slapped on it when we first moved in to avoid leaks.  When we moved in, we were told that it (along with pretty much everything else on the house) needed to be replaced sooner than later.  Since we had re-done all the siding on the house and had it painted the previous summer, we decided to embark on doing the roof.  We knew that replacing the roof ourselves was out of the question, but thought that replacing the rafter tails and the tongue and groove were right up our ally-an easy project after the he** of replacing siding.  So our journey began first with tearing our our old chimney that was used for venting the furnace.
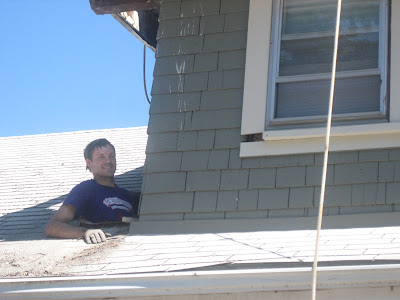
After Steve removed the bricks above the dormer-notice pulley system rope

Steve, the smartie that he is, decided that a summer day where I think the temp was somewhere in the 90s was the perfect opportunity to spend the day shimmy-ing himself through the inners of our house.  Of course, we really hadn't discussed it, it was more like I take a break from whatever I was working on to find Steve on top of the roof and some the bricks from the chimney missing. insert Skye's thought bubble:  hmmmmmm, guess that's what we're doing today as there is no stopping Steve once he starts a deconstruction project.

We had one problem....how would we get those bricks from the chimney to the ground (of course we had no dumpster or pre-plan)?  I can't remember the order of events, but at one point he was actually able to throw them down and they landed (or at least 90%) in one of those yellow recycle bins that had an old piece of carpet in it-mostly intact as well.  I would then run-in between throwing fits of Steve's and empty the bins so that he could refill them.  We also tried using an old army surplus bag.  Steve would fill the bag with bricks, clip it closed and lower it down using a rope tied to it.  I think that is what we did first and then resorted to just throwing them when the whole army bag method got old and we saw just how many bricks we had to move. 
On his way into the house-he is sorta in the chimney/wall/cabinet at this point

Then came the point when Steve had removed all the bricks from above the roofline.  He was able to reach into the house (quite a site) to remove and throw down a couple more feet of bricks.  That is when my husband started to disappear.  Next thing I knew, he started to maneuver himself down through the house.  He braced himself on some of the bricks (not the smartest idea being that the mortar was so loose that 90% of the bricks could just be lifted off) while removing bricks and thowing them out to me. 

Well, probably around an hour later and several hours into the project, Steve found himself well into the main floor of the house and no longer able to get rid of the bricks by throwing out the roof and to the ground, and, well, frankly committed to finishing the removal of the chimney being that he was stuck in the innards of the house and what goes in must come out (isn't that how the saying goes?).  Luckily, we had an opening in the basement that the furnace had been connected to (a whole other story in itself) so he was able to drop the bricks down the chimney.  Once the hole seemed pretty well blocked, I would holler at Steve (a project that I apparently committed to as well without even knowing it, being that I did want my husband back and not stuck in the wall of our house-come on, there were projects to be completed), he would stop and I would remove the bricks so that the cycle could start again.  Like a record on repeat-FOR HOURS.

Finally (I think I was getting hungry for dinner at this point), we had moved enough bricks gone for Steve to come out of the chimney and hop down into the basement.  Well, what were we left with?  A large, and I mean large, pile of bricks (which was awesome as we had a brick patio planned, see finished product here) and hole in our roof.  woo-hoo, right?  Well, fast forward close to three years, ok, maybe 2.5, and now we have a new roof (that was completed just a month or so after) but we have a nice hole in the back corner of one of our kitchen cabinets that is prime real estate for cabinets once we start planning our kitchen remodel.  We are currently discussing (as we have for a couple years) our kitchen layout and collecting pictures.
Small stack of the bricks removed, wish I had a picture of the mess in the basement but note how intact they are

Even went to the tour of remodeled homes this weekend and found some great ideas of what we DO and DO NOT want to do with our remodel.  I was also fortunate enough to meet fellow house blogger and bungalow goddess Sharon over at Laurelhurst Craftsman Restoration, her husband Jeff and their pup Shasta.  They already have an amazing home but have amazing restoration plans and a remodel due to start the end of this month.  I can't wait to see the results and follow their progress. 

More on the roof saga in the next several posts

Thursday, March 3, 2011

Baby Proofing does =Beauty

Well, in very few cases and I am lucky to have one of them.  After almost a year in the making, I got to pick up the first set of the of leaded glass windows today and boy, are they beauties.  And boy, will they keep my little turkey out of trouble...at least for a little while.  Due to some unforeseen delays with other projects, the man making the leaded glass panels will not have the other two sets ready for us until later this month-total bummer but at least this set is ready as it is one of Ben's favorite places to bang on right now.
luvin the leaded glass

finally got to put back (and dust) all my treasures, one of the Japanese Saki glasses succumbed to the little dude

He is so proud of himself when he helps "unpack"

trying to cause trouble, note baby-proofing on built-in; the only door in the dining/living room he has figured out yet


Tuesday, March 1, 2011

gates galore

Here are just another few nice fence pix that my husband found while searching the internet this past weekend.  I found a couple while driving in the rain this weekend but am hoping for some nice weather so I can walk to them (if I remember where they are) and snap some pictures.
This one would really let the light and looky-loos through, found here

we would like to do some sections of fence sorta like this through the garden for light and to let some plants (thinking beans) grow, found here

basic, basic but nice, found here